


django框架因其由Python全程编写完成,让其在数个框架中脱颖而出,更别说其他的一些配置包金额数据库,这可以使得不需要修改应用程序代码就可以在Vitess上运行Django应用程序,接下来就给大家分享一下django框架怎么在Vitess上运行?
以下部分包括这些步骤:
-
创建Vitess操作器pod
-
构建Vitess集群组件(1x主tablet、1x复制tablet、3x etcd pod、1x vtgate、1x vtctld、1x vitessbackup)
-
创建“weatherapp”数据库模式和用户
$ kubectl apply -f operator.yaml
customresourcedefinition.apiextensions.k8s.io/etcdlockservers.planetscale.com created
customresourcedefinition.apiextensions.k8s.io/vitessbackups.planetscale.com created
customresourcedefinition.apiextensions.k8s.io/vitessbackupstorages.planetscale.com created
customresourcedefinition.apiextensions.k8s.io/vitesscells.planetscale.com created
customresourcedefinition.apiextensions.k8s.io/vitessclusters.planetscale.com created
customresourcedefinition.apiextensions.k8s.io/vitesskeyspaces.planetscale.com created
customresourcedefinition.apiextensions.k8s.io/vitessshards.planetscale.com created
serviceaccount/vitess-operator created
role.rbac.authorization.k8s.io/vitess-operator created
rolebinding.rbac.authorization.k8s.io/vitess-operator created
priorityclass.scheduling.k8s.io/vitess created
priorityclass.scheduling.k8s.io/vitess-operator-control-plane created
deployment.apps/vitess-operator created

$ kubectl get pods
NAME                               READY   STATUS    RESTARTS   AGE
vitess-operator-7f9c9d58f6-q5zlf   1/1     Running   0          20s
用一个名为“weatherapp”的示例数据库初始化这个集群,访问它的用户/密码将嵌入到配置文件中。我们基本上是在创建一个数据库,类似于Vitess中的密钥空间。
$ kubectl apply -f 101_initial_cluster.yaml.django
$ kubectl get pods
NAME                                                 READY   STATUS      RESTARTS   AGE
example-90089e05-vitessbackupstorage-subcontroller   1/1     Running     0          94s
example-etcd-faf13de3-1                              1/1     Running     0          94s
example-etcd-faf13de3-2                              1/1     Running     0          94s
example-etcd-faf13de3-3                              1/1     Running     0          94s
example-vttablet-zone1-1542279354-edf1c7bf           2/3     Running     1          94s
example-vttablet-zone1-3763665199-476cbd65           2/3     Running     2          94s
example-weatherapp-x-x-vtbackup-init-75efaeeb        0/1     Completed   0          74s
example-zone1-vtctld-1d4dcad0-67bfd56b8b-4dr9s       1/1     Running     2          94s
example-zone1-vtgate-bc6cde92-59b88bc8d8-6wz86       1/1     Running     2          94s
vitess-operator-7f9c9d58f6-q5zlf                     1/1     Running     0          4m30s
如你所见,这将带来一个功能齐全的托管Vitess集群,其中包含一个未分片的密钥空间,其中包括一个“主”和一个“副本”。
步骤1 - 设置portforward
$ cat pf.sh ; ./pf.sh &
#!/bin/sh

kubectl port-forward --address localhost "$(kubectl get service --selector="planetscale.com/component=vtctld" -o name | head -n1)" 15000 15999 &
process_id1=$!
kubectl port-forward --address localhost "$(kubectl get service --selector="planetscale.com/component=vtgate,!planetscale.com/cell" -o name | head -n1)" 15306:3306 &
process_id2=$!
sleep 2
echo "You may point your browser to http://localhost:15000, use the following aliases as shortcuts:"
echo 'alias vtctlclient="vtctlclient -server=localhost:15999 -logtostderr"'
echo 'alias mysql="mysql -h 127.0.0.1 -P 15306 -u user"'
echo "Hit Ctrl-C to stop the port forwards"
wait $process_id1
wait $process_id2
检查Tablets:
$ vtctlclient ListAllTablets
Handling connection for 15999
zone1-1542279354 weatherapp - replica 10.100.1.75:15000 10.100.1.75:3306 [] <null>
zone1-3763665199 weatherapp - master 10.100.3.57:15000 10.100.3.57:3306 [] 2020-10-16T09:06:59Z
步骤2 - 验证数据库
$ alias mysql="mysql -h 127.0.0.1 -P 15306 -u djangouser -p"
$ mysql
mysql: [Warning] Using a password on the command line interface can be insecure.
Handling connection for 15306
Welcome to the MySQL monitor.  Commands end with ; or \g.
Your MySQL connection id is 1
Server version: 5.7.9-Vitess MySQL Community Server (GPL)

Copyright (c) 2000, 2020, Oracle and/or its affiliates. All rights reserved.

Oracle is a registered trademark of Oracle Corporation and/or its
affiliates. Other names may be trademarks of their respective
owners.

Type 'help;' or '\h' for help. Type '\c' to clear the current input statement.

mysql> show databases;
+------------+
| Databases  |
+------------+
| weatherapp |
+------------+
1 row in set (0.16 sec)
步骤3 - 设置应用程序环境
现在我们已经设置了具有MySQL后端的Vitess集群,接下来可以构建Django应用程序了。我们将使用Django-admin命令构建一个Django项目。
$ mkdir my_weather_app
$ cd my_weather_app
$ python3 -m venv env
$ . env/bin/activate
(env) askdba:my_weather_app askdba$
$ pip install django
$ django-admin startproject weatherapp
$ cd weatherapp/
$ ls -la
total 8
drwxr-xr-x  4 askdba  staff  128 Oct 16 12:19 .
drwxr-xr-x  4 askdba  staff  128 Oct 16 12:18 ..
-rwxr-xr-x  1 askdba  staff  666 Oct 16 12:18 manage.py
drwxr-xr-x  7 askdba  staff  224 Oct 16 12:18 weatherapp
Edit configuration file and update following section.
$ vi weatherapp/settings.py [link to sample file]
import os
# Database
# https://docs.djangoproject.com/en/3.0/ref/settings/#databases

DATABASES = {
    'default': {
        'ENGINE': 'custom_db_backends.vitess',
        'OPTIONS': {
            'read_default_file': '/usr/local/mysql/my.cnf',
        },
    }
}

STATIC_ROOT = os.path.join(BASE_DIR, 'static')

...
# SECURITY WARNING: don't run with debug turned on in production!
DEBUG = True

ALLOWED_HOSTS = ['127.0.0.1']

# Application definition
...
将customs_db_backends目录复制到项目目录。你可以将Vitess项目克隆到本地目录。
$ cp -r ~/vitess/support/django/custom_db_backends .
$ vi /usr/local/mysql/my.cnf [link to sample my.cnf]
[client]
database = weatherapp
user = djangouser
password = ********
port = 15306
host = 127.0.0.1
default-character-set = utf8mb4
步骤4 - 安装MySQL客户端连接器
$ pip install mysqlclient
Collecting mysqlclient
  Using cached mysqlclient-2.0.1.tar.gz (87 kB)
Using legacy 'setup.py install' for mysqlclient, since package 'wheel' is not installed.
Installing collected packages: mysqlclient
    Running setup.py install for mysqlclient ... done
Successfully installed mysqlclient-2.0.1
步骤5 - 在Vitess集群上构建Django框架
在这个阶段,我们已经准备好运行迁移来创建初始的Django元数据。
$ python manage.py migrate
Operations to perform:
  Apply all migrations: admin, auth, contenttypes, sessions
Running migrations:
  Applying contenttypes.0001_initial... OK
  Applying auth.0001_initial... OK
  Applying admin.0001_initial... OK
  Applying admin.0002_logentry_remove_auto_add... OK
  Applying admin.0003_logentry_add_action_flag_choices... OK
  Applying contenttypes.0002_remove_content_type_name... OK
  Applying auth.0002_alter_permission_name_max_length... OK
  Applying auth.0003_alter_user_email_max_length... OK
  Applying auth.0004_alter_user_username_opts... OK
  Applying auth.0005_alter_user_last_login_null... OK
  Applying auth.0006_require_contenttypes_0002... OK
  Applying auth.0007_alter_validators_add_error_messages... OK
  Applying auth.0008_alter_user_username_max_length... OK
  Applying auth.0009_alter_user_last_name_max_length... OK
  Applying auth.0010_alter_group_name_max_length... OK
  Applying auth.0011_update_proxy_permissions... OK
  Applying auth.0012_alter_user_first_name_max_length... OK
  Applying sessions.0001_initial... OK
步骤6 - 创建一个管理员用户
创建一个管理用户来访问Django管理界面。
$ python manage.py createsuperuser
Username (leave blank to use 'askdba'): askdba
Email address: alkin@planetscale.com
Password:
Password (again):
The password is too similar to the email address.
This password is too short. It must contain at least 8 characters.
Bypass password validation and create user anyway? [y/N]: y
Superuser created successfully.
(env) askdba:weatherapp askdba$
步骤7 - 启动Django守护进程
$ python manage.py runserver 127.0.0.1:8000
Watching for file changes with StatReloader
Performing system checks...

System check identified no issues (0 silenced).
October 16, 2020 - 09:37:02
Django version 3.1.2, using settings 'weatherapp.settings'
Starting development server at http://127.0.0.1:8000/
Quit the server with CONTROL-C.
步骤8 - 转到Django管理页面
将浏览器指向http://127.0.0.1:8000/admin
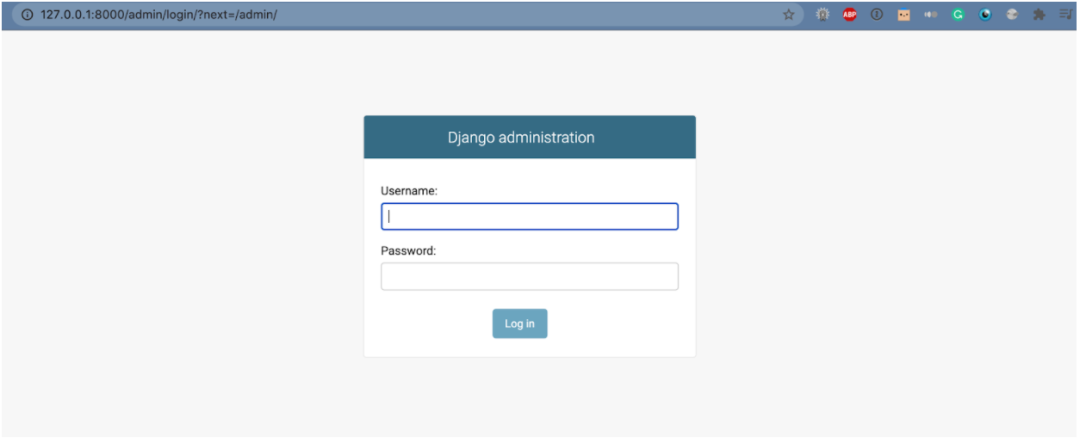
管理员登录界面
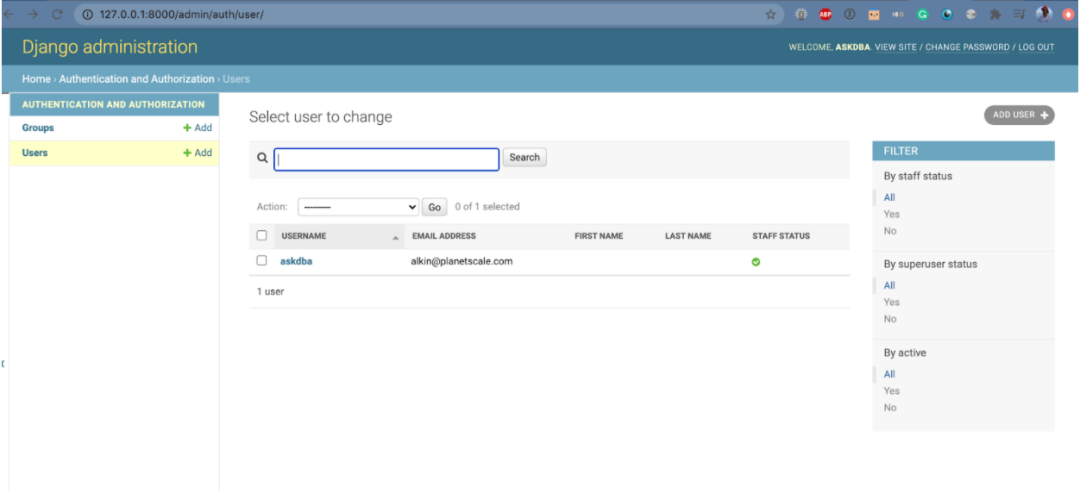
用户/角色管理屏幕
以上就是“django框架怎么在Vitess上运行?”的详细内容,想要了解更多关于django框架欢迎持续关注编程学习网
扫码二维码 获取免费视频学习资料

- 本文固定链接: http://www.phpxs.com/post/9823/
- 转载请注明:转载必须在正文中标注并保留原文链接
- 扫码: 扫上方二维码获取免费视频资料