

Nginx服务优化可以从隐藏版本号、更改用户与组、配置网页缓存时间、日志切割、设置连接超时这几个方面进行优化。下面来详细的看看
1.隐藏版本号
在生产环境中需要隐藏Nginx的版本号,以避免泄露Nginx的版本,使×××者不能针对特定版本进行×××。查看Nginx的版本在CentOS中使用命令curl -I http://172.16.10.10/即可。
[root@localhost ~]# curl -I http://172.16.10.10/ HTTP/1.1 200 OK Server: nginx/1.12.0 #Nginx版本信息 Date: Fri, 29 Jun 2018 08:52:27 GMT Content-Type: text/html Content-Length: 483 Last-Modified: Fri, 29 Jun 2018 06:56:20 GMT Connection: keep-alive ETag: "5b35d814-1e3" Accept-Ranges: bytes
隐藏版本号有两种方式,一种是修改Nginx的源码文件,指定不显示版本号,第二种是修改Nginx的主配置文件。
修改主配置文件的方式如下:
将Nginx的配置文件中的server_tokens选项值设置为off,如没有该配置项,加上即可。
[root@localhost ~]# vim /usr/local/nginx/conf/nginx.conf ........... #省略内容 http { include mime.types; default_type application/octet-stream; server_tokens off; #关闭版本号 ............ #省略内容
[root@localhost ~]# nginx -t #测试配置文件 nginx: the configuration file /usr/local/nginx/conf/nginx.conf syntax is ok nginx: configuration file /usr/local/nginx/conf/nginx.conf test is successful
再次访问网址,只显示Nginx,版本号已经隐藏。
[root@localhost ~]# service nginx restart #重新启动nginx服务 [root@localhost ~]# curl -I http://172.16.10.10/ HTTP/1.1 200 OK Server: nginx #nginx隐藏了版本号 Date: Fri, 29 Jun 2018 09:09:36 GMT Content-Type: text/html Content-Length: 483 Last-Modified: Fri, 29 Jun 2018 06:56:20 GMT Connection: keep-alive ETag: "5b35d814-1e3" Accept-Ranges: bytes
Nginx的源码文件包含了版本信息,可以随意设置,然后重新编译安装,就会隐藏版本信息。
[root@localhost ~]# vim /opt/nginx-1.12.0/src/core/nginx.h #编辑源码文件 #define NGINX_VERSION "1.1.1" #修改版本号 #define NGINX_VER "IIS" NGINX_VERSION #修改服务器类型
重新编译安装
[root@localhost ~]# cd /opt/nginx-1.12.0/ [root@localhost nginx-1.12.0]#./configure --prefix=/usr/local/nginx --user=nginx --group=nginx --with-http_stub_status_module && make && make install
再次访问网址,只显示修改之后的版本信息。
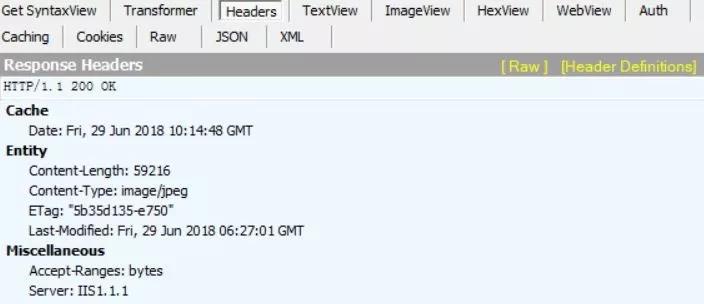
[root@localhost nginx-1.12.0]# service nginx restart #重启nginx服务 [root@localhost nginx-1.12.0]# curl -I http://172.16.10.10/HTTP/1.1 200 OK Server: IIS1.1.1 #nginx的版本信息 Date: Fri, 29 Jun 2018 09:30:09 GMT Content-Type: text/html Content-Length: 483 Last-Modified: Fri, 29 Jun 2018 06:56:20 GMT Connection: keep-alive ETag: "5b35d814-1e3" Accept-Ranges: bytes
2.修改用户和组
Nginx运行时进程需要有用户与组的支持,用以实现对网站文件读取时进行访问控制。主进程由root创建,子进程由指定的用户与组创建。Nginx默认使用nobody用户账号与组账号,一般要修改。
(1)编译Nginx时指定用户与组,就是配置nginx时,在./configure后面指定用户与组的参数。
[root@localhost ~]# cd /opt/nginx-1.12.0/ [root@localhost nginx-1.12.0]#./configure --prefix=/usr/local/nginx --user=nginx #指定用户名是nginx --group=nginx #指定组名是nginx --with- && make && make install
(2)修改Nginx配置文件nginx.conf指定用户与组。
[root@localhost ~]# vim /usr/local/nginx/conf/nginx.conf user nginx nginx; #修改用户为nginx,组为nginx
重启nginx查看进程运行情况,主进程由root账户创建,子进程由nginx创建。
[root@localhost ~]# ps aux | grep nginx root 14923 0.0 0.0 20540 624 ? Ss 17:30 0:00 nginx: master process /usr/local/nginx/sbin/nginx #主进程由root创建 nginx 14925 0.0 0.1 22984 1412 ? S 17:30 0:00 nginx: worker process #子进程由nginx创建 root 19344 0.0 0.0 112720 984 pts/0 R+ 17:47 0:00 grep --color=auto nginx
3.配置网页缓存时间
当Nginx将网页数据返回给客户端后,可设置缓存时间,方便日后进行相同内容请求是直接返回,避免重复请求,加快访问速度,一般只针对静态资源进行设置,对动态网页不用设置缓存时间。
操作步骤如下所示:
(1)以图片作为缓存对象,将game.jpg放到Nginx的网站目录下。
[root@localhost ~]# cd /usr/local/nginx/html/ #Nginx的网站目录 [root@localhost html]# ls 50x.html error.png game.jpg index.html test.html
(2)访问http://172.16.10.10/game.jpg, 再用Fidder工具抓包,查看响应报文,没有图片的缓存信息。
(3)修改配置文件,在新的location段加入expire参数,指定缓存时间,1d表示一天。
[root@localhost ~]# vim /usr/local/nginx/conf/nginx.conf location ~\.(gif|jpg|jepg|png|bmp|ico)$ { #加入新的location root html; expires 1d; #指定缓存时间 }
(4)重启nginx服务,访问网址抓包,响应报文中含有Expire参数,表示缓存的时间。
[root@localhost ~]# service nginx restart

扫码二维码 获取免费视频学习资料

- 本文固定链接: http://www.phpxs.com/post/6254/
- 转载请注明:转载必须在正文中标注并保留原文链接
- 扫码: 扫上方二维码获取免费视频资料